- First open your photo and your watermark in Photoshop Elements. I have both on my desktop.
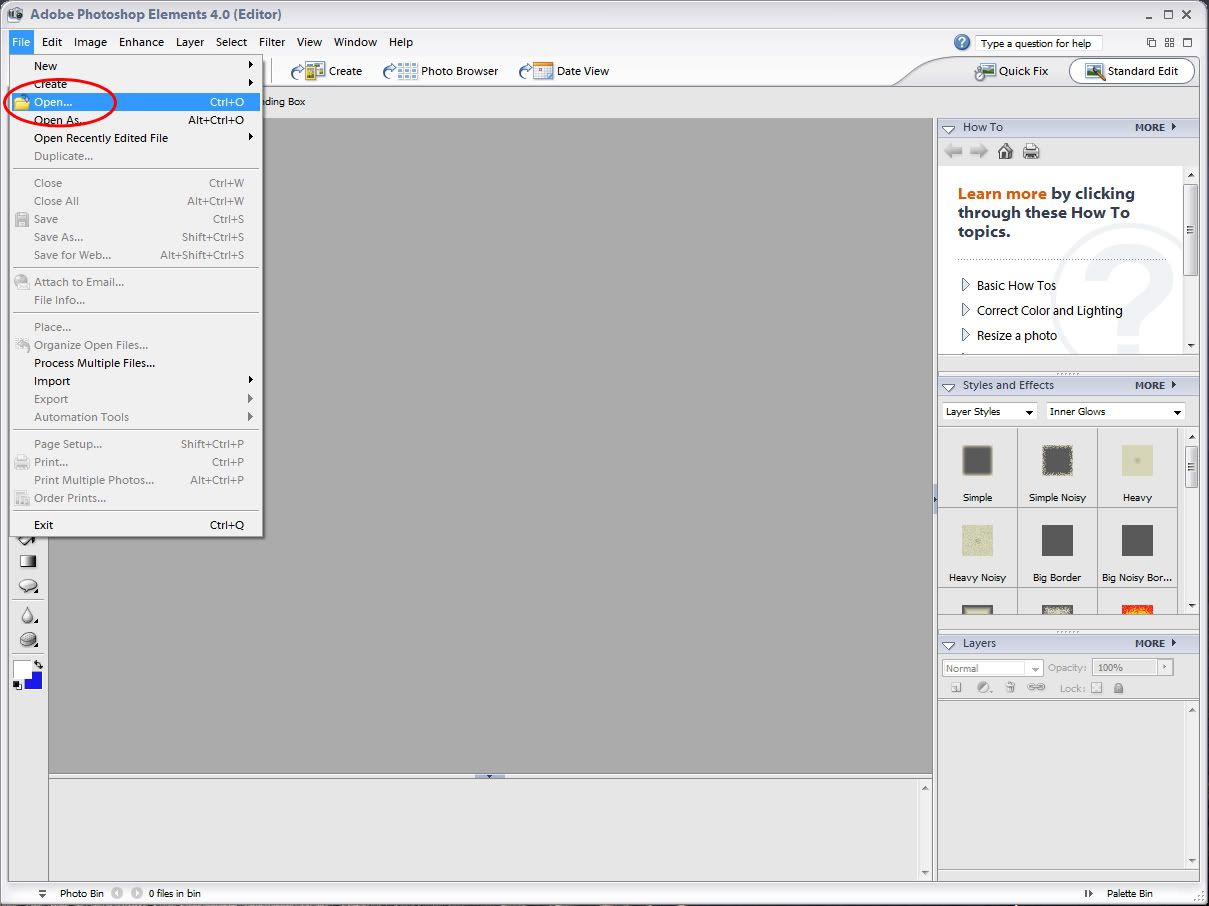
- File>Open:
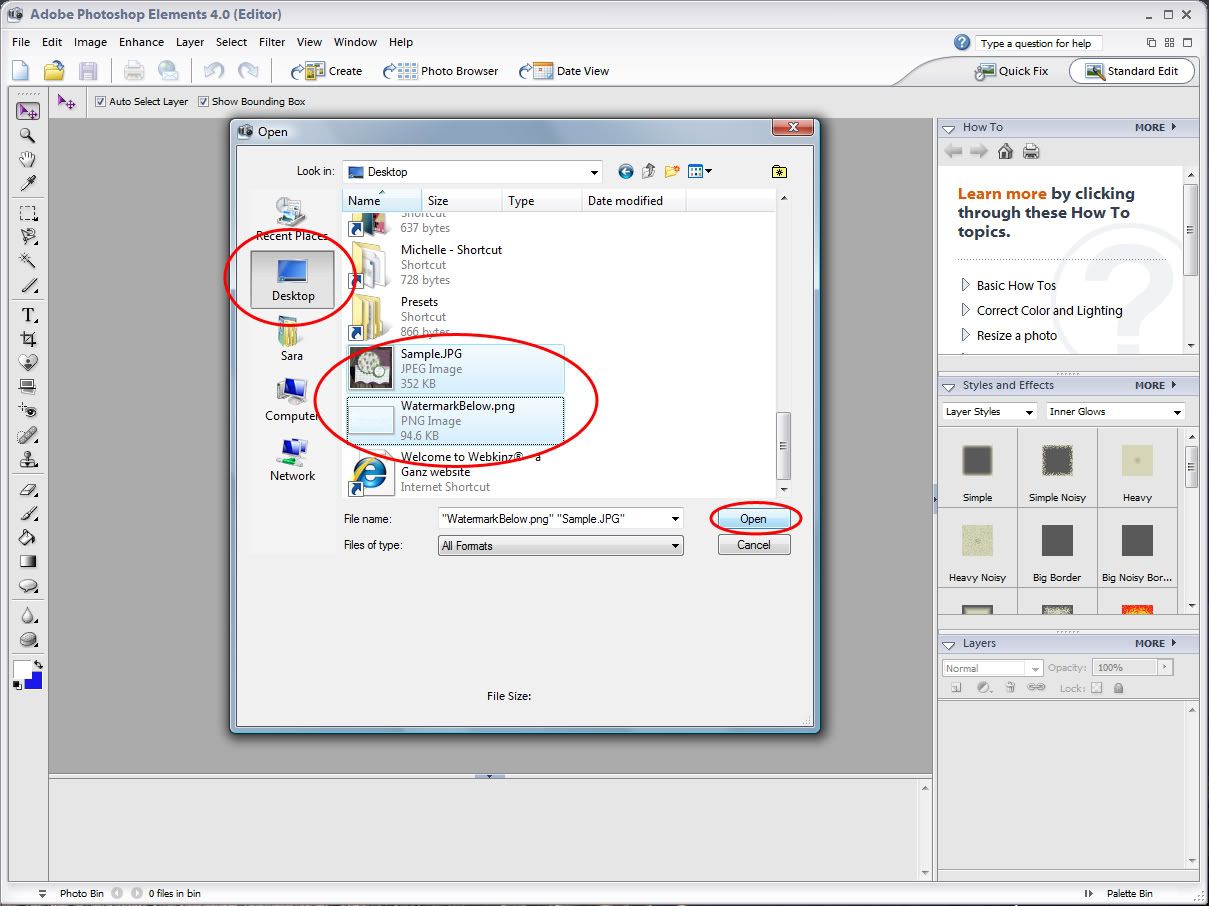
- Click Desktop (or the location where you can find your watermark and photo).
- Click to select the first file (my image is named Sample.jpg), push and hold the Ctrl key while clicking to select the second file (my image is named WatermarkBelow.png).
Click on Open.
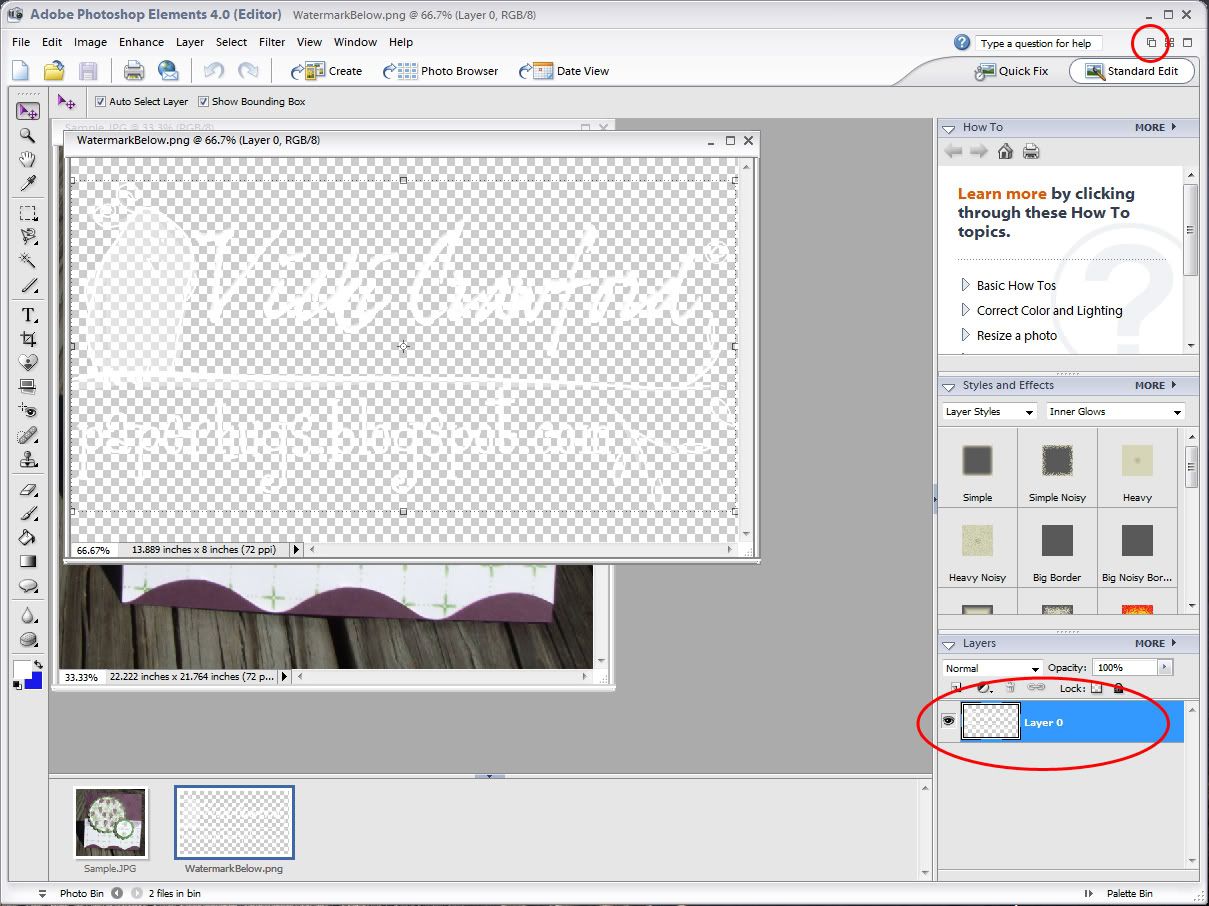
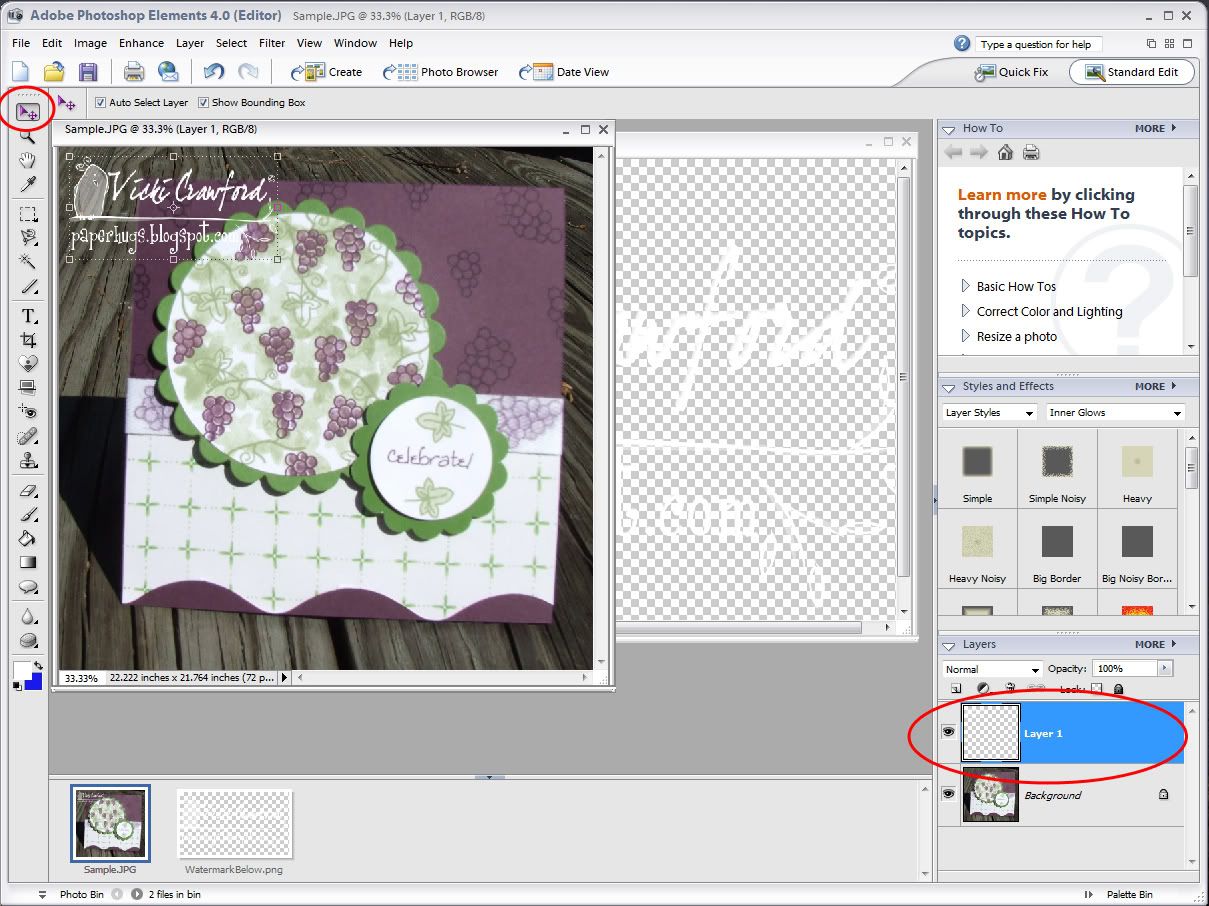
You will see both images. Here the photo is in back and the watermark is on top. If you don't see both click the Cascade button in the upper right corner. - Now simply drag the layer that has the watermark from the watermark file to the photo. To do this click on the layer, keep the mouse button pressed while dragging it onto your photo.
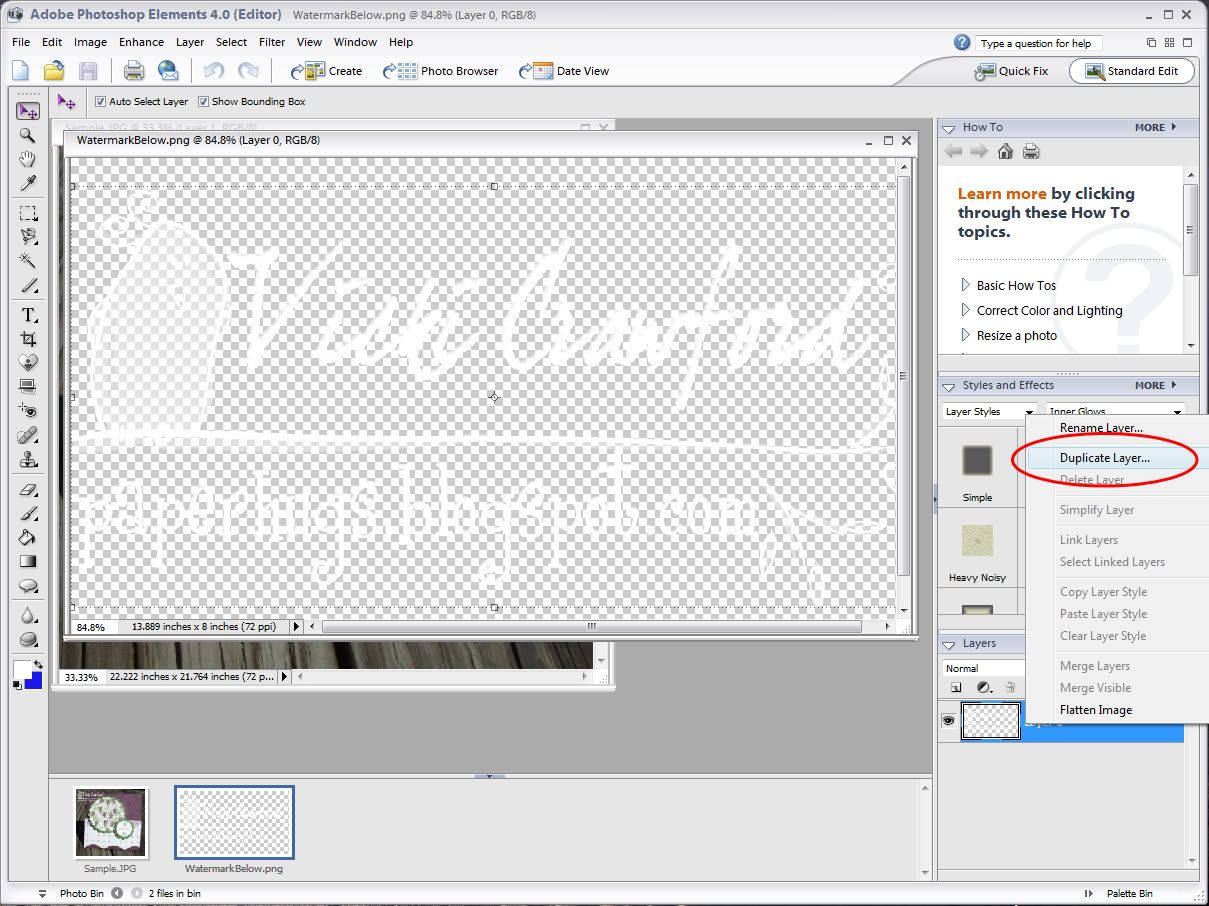
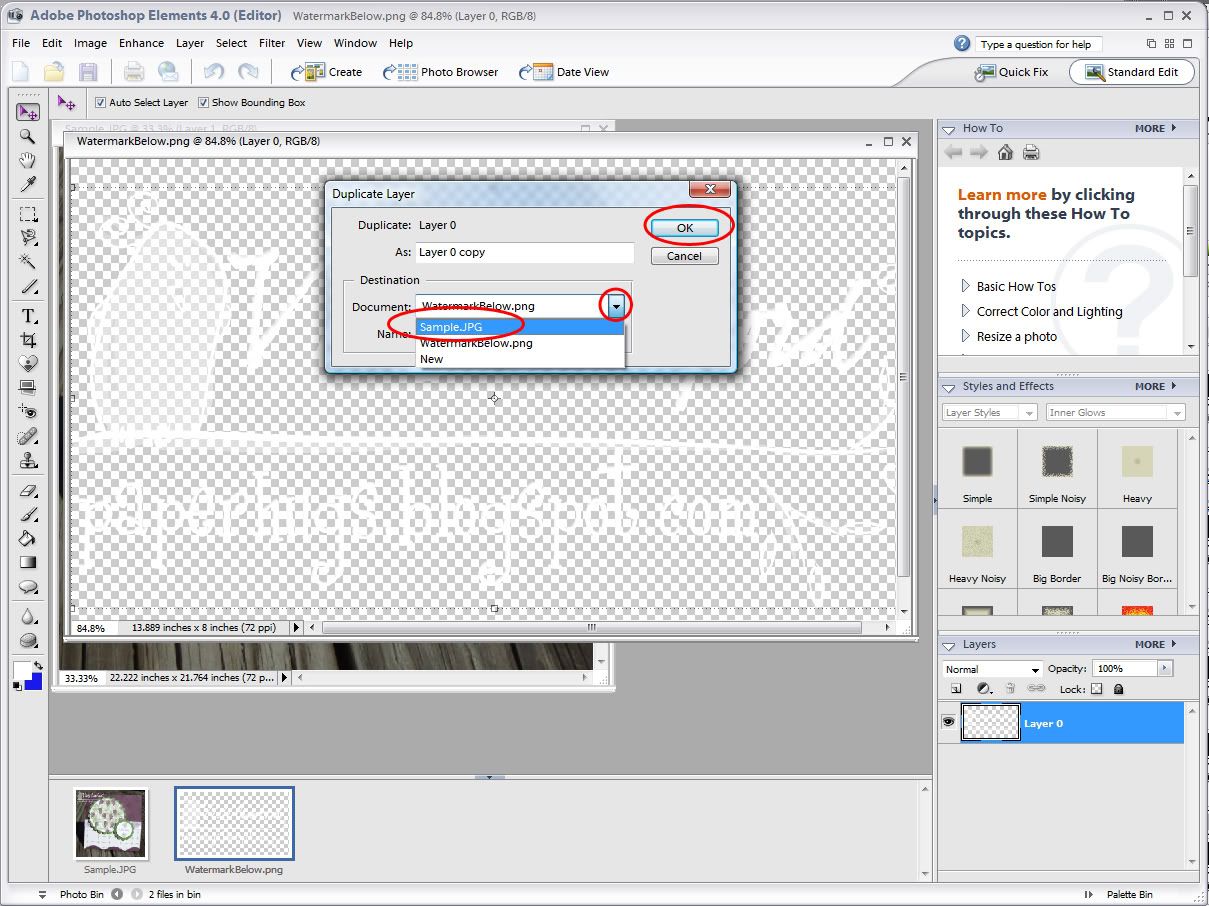
- If you have trouble you can also right click on the layer, click on Duplicate Layer:
- Select the appropriate file (again my photo is named Sample.jpg) and then click OK:
- If you have trouble you can also right click on the layer, click on Duplicate Layer:
- Now you will see the watermark. Make sure you have the watermark layer selected as well as the Move Tool on the left toolbar.
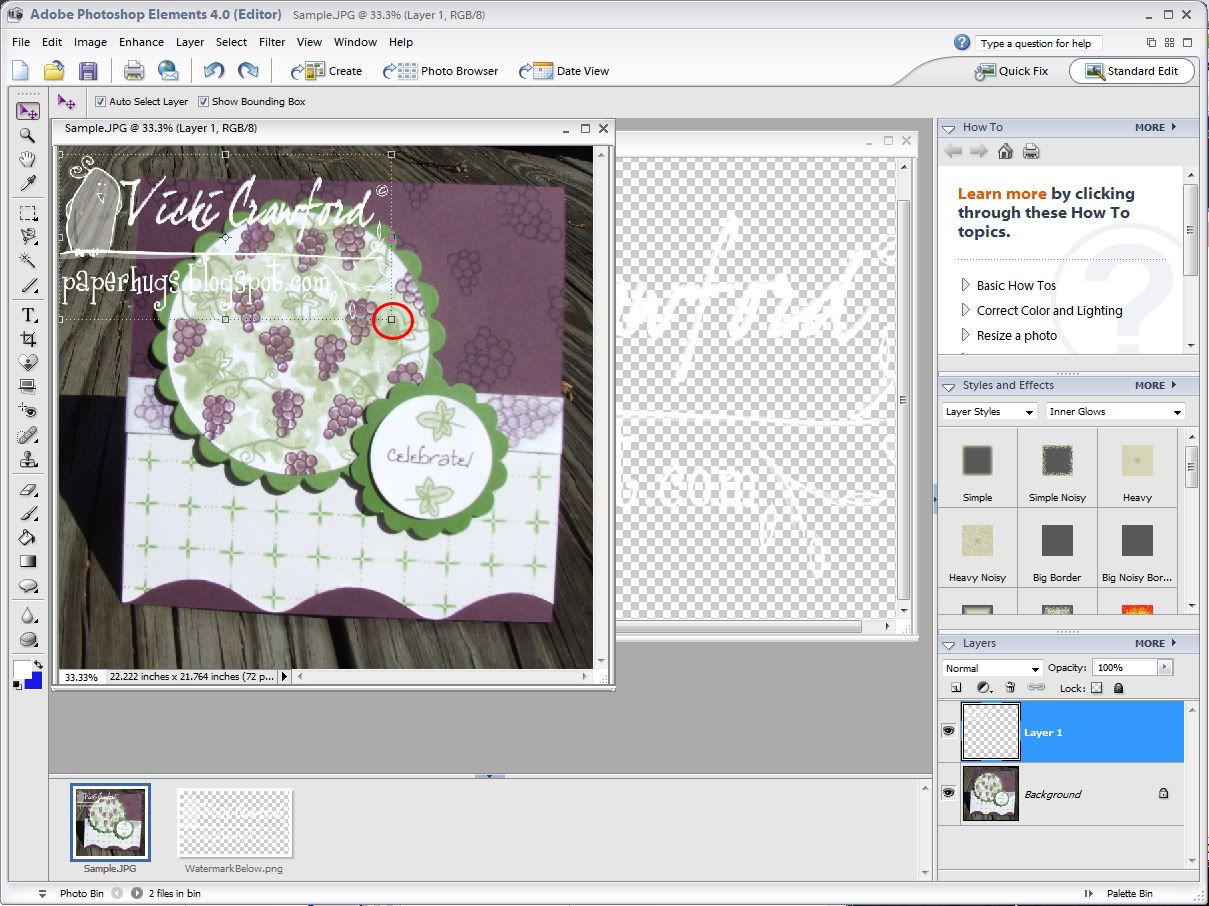
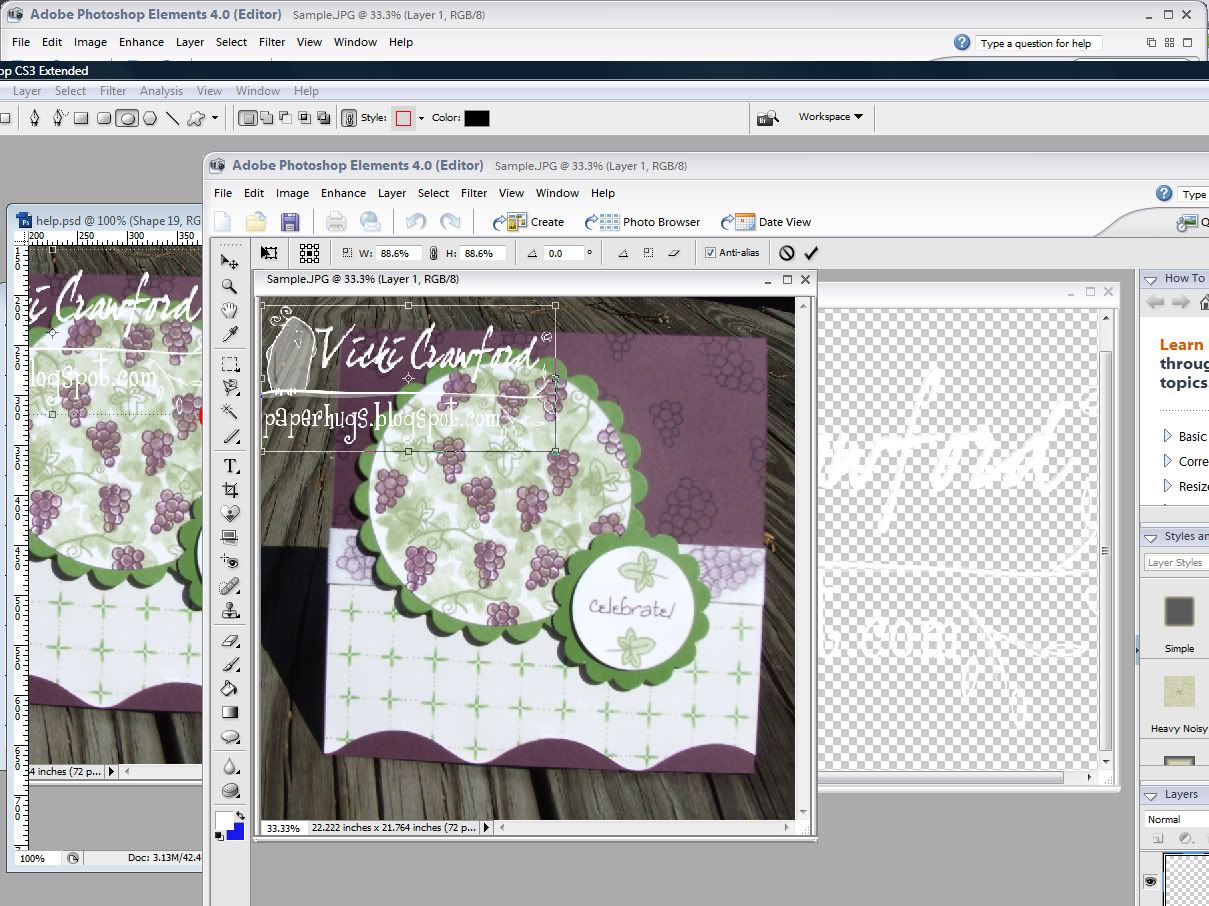
- To resize the watermark you simply move the mouse over the corner, the cursor will change to a double diagonal arrow. Click and hold the mouse button ALSO while holding in the shift key. Move the mouse in and out. You will see the watermark resizing. Pressing the shift key as you do this ensures the proportions stay constrained (doesn't become elongated or squinched).
Once you get the desired size hit enter on the keyboard to commit your changes. - You can also move it by dragging it to where you want it. Again to do press and hold mouse button while moving the mouse.
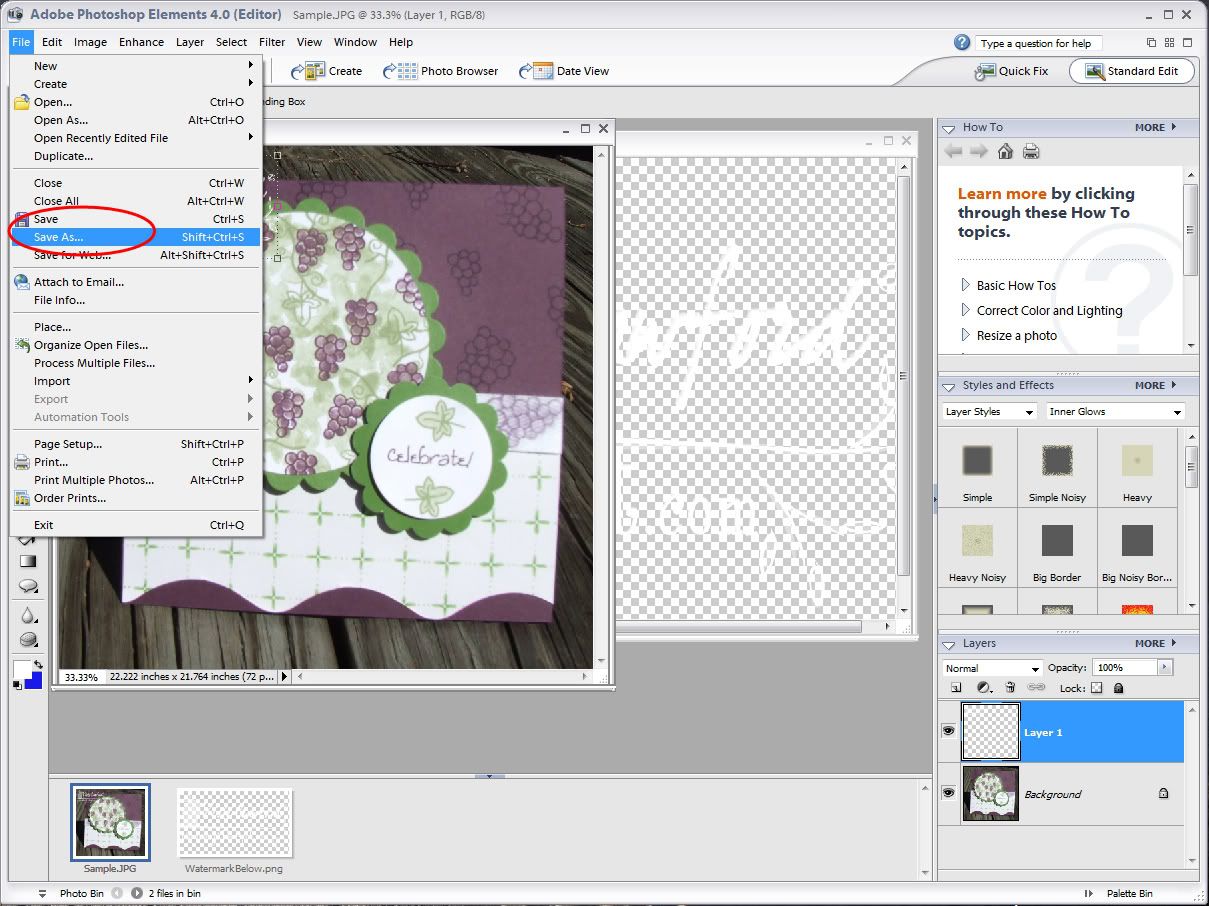
Now Save it, in order to keep your original UNMARKED photo you will need to click Save As. - File>Save As>
- Choose the location, here I chose Desktop. The name will default to the original file name with the word "copy" after it, change this to whatever you want. Select JPEG under File Type and click Save.
- The default settings are fine so click OK again and you have your new watermarked photo!

Showing posts with label Photoshop Elements. Show all posts
Showing posts with label Photoshop Elements. Show all posts
Tuesday, July 8, 2008
Using your PNG Watermark in Photoshop Elements
These instructions were written using Photoshop Elements 4. It should be similar to other versions of Photoshop Elements.


Wednesday, May 7, 2008
Changing the Color of your PNG Watermark with Photoshop Elements
These instructions were written using Photoshop Elements 4.0. Some things may or may not be different in other versions.
- Open the watermark in Photoshop Elements.
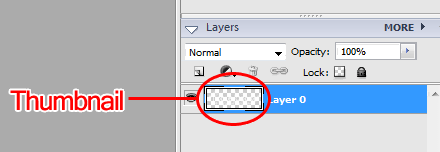
- Push and hold the Ctrl key as you click on the Layer Thumbnail. This will select the image leaving out the background (grey checked rectangular in the bottom right corner):

- When you mouse over the thumbnail the pointer will become a hand. Then when you press and hold Ctrl the pointer becomes a hand with a box on top. When you see this click on the thumbnail. This will select the watermark's elements leaving out the background.
- Click on Layer at the top and then select New Fill Layer and then Solid Color:

- You will see the New Layer dialog box, name it if you wish and then click OK.
- The color chooser will appear, so get to choosing!
- When you get the desired color click OK.
- Click on File and then Save.


You have 2 options here.
- Just flatten the layers and save the PNG - Change the file name accordingly. Select PNG from the drop down and then click Save, yes you want None...OK.
OR
- You can save in PSD format. This will allow you to go back and edit the new color layer you made if you want a different color later. - Change the file name accordingly. Then click on Save.
Here's how to modify the color layer later:
- Open the PSD you saved before.
- Double click on the thumbnail of the color layer you made previously (here it is the pink square):

- The color chooser will appear. Choose your color and click OK.
- Click File, Save As, Name file, choose PNG and click OK...
- Done!

Monday, February 4, 2008
Installing and Using Your Photoshop Watermark Brush
To install your new brush just copy the "Your Name.abr" file to your brushes preset folder for Photoshop.
To open this folder you can double click on ”My Computer”, the “C:” drive, “Program Files” and so on OR click the link below:
C:\Program Files\Adobe\Photoshop Elements 4.0\Presets\Brushes
This will not work if you did not install Photoshop to the default directory. If it doesn’t open your brushes folder you will need to locate the directory where Photoshop is installed. Let me know if you need help!
Now that the folder is open simply drag (click the file and drag it while keeping the mouse button pressed) the “Your Name.abr” file from your email into the folder. You can also right click “Your Name.abr”, click “Copy”, then right click in the “Brushes” window and click “Paste”. It does the same thing.
If Photoshop was open while you did this you will need to close it and then re-open it to see the brush.
If you need further assistance installing the brush please let me know.
------------------------------------
Using the brush
Open your picture in Photoshop Elements.
Select your desired color. Double click on the foreground color selector (here it’s currently blue):

I have selected White
Select the brush tool on the left and then select Load Brushes from the brush presets:

A file Open dialog appears, double click on "Your Name".
You loaded the file…now it’s time to select it from the bottom of your list…scroll it to the bottom then click it! Adjust the size next door. Sometimes you may want it bigger or smaller…who knows. I can make it in whatever size you'd like so you never have to change it!

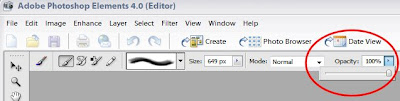
You can also change the opacity, just move tha slider from left to right:
Save and you’re done!
I also included the .png version of your watermark as well. If you need help using it or would like it in another color please let me know.
To open this folder you can double click on ”My Computer”, the “C:” drive, “Program Files” and so on OR click the link below:
C:\Program Files\Adobe\Photoshop Elements 4.0\Presets\Brushes
This will not work if you did not install Photoshop to the default directory. If it doesn’t open your brushes folder you will need to locate the directory where Photoshop is installed. Let me know if you need help!
Now that the folder is open simply drag (click the file and drag it while keeping the mouse button pressed) the “Your Name.abr” file from your email into the folder. You can also right click “Your Name.abr”, click “Copy”, then right click in the “Brushes” window and click “Paste”. It does the same thing.
If Photoshop was open while you did this you will need to close it and then re-open it to see the brush.
If you need further assistance installing the brush please let me know.
------------------------------------
Using the brush
Open your picture in Photoshop Elements.
Select your desired color. Double click on the foreground color selector (here it’s currently blue):

I have selected White
Select the brush tool on the left and then select Load Brushes from the brush presets:

A file Open dialog appears, double click on "Your Name".
You loaded the file…now it’s time to select it from the bottom of your list…scroll it to the bottom then click it! Adjust the size next door. Sometimes you may want it bigger or smaller…who knows. I can make it in whatever size you'd like so you never have to change it!

You can also change the opacity, just move tha slider from left to right:

Save and you’re done!
I also included the .png version of your watermark as well. If you need help using it or would like it in another color please let me know.
Subscribe to:
Posts (Atom)

