First you need to open Photoshop and open your photo AND your watermark in Photoshop. I have both on the desktop in my example.
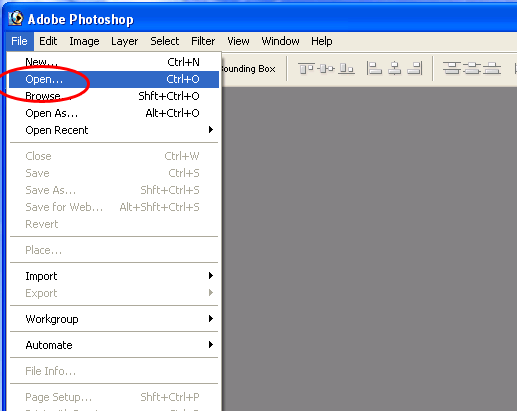
Click on File> Open>
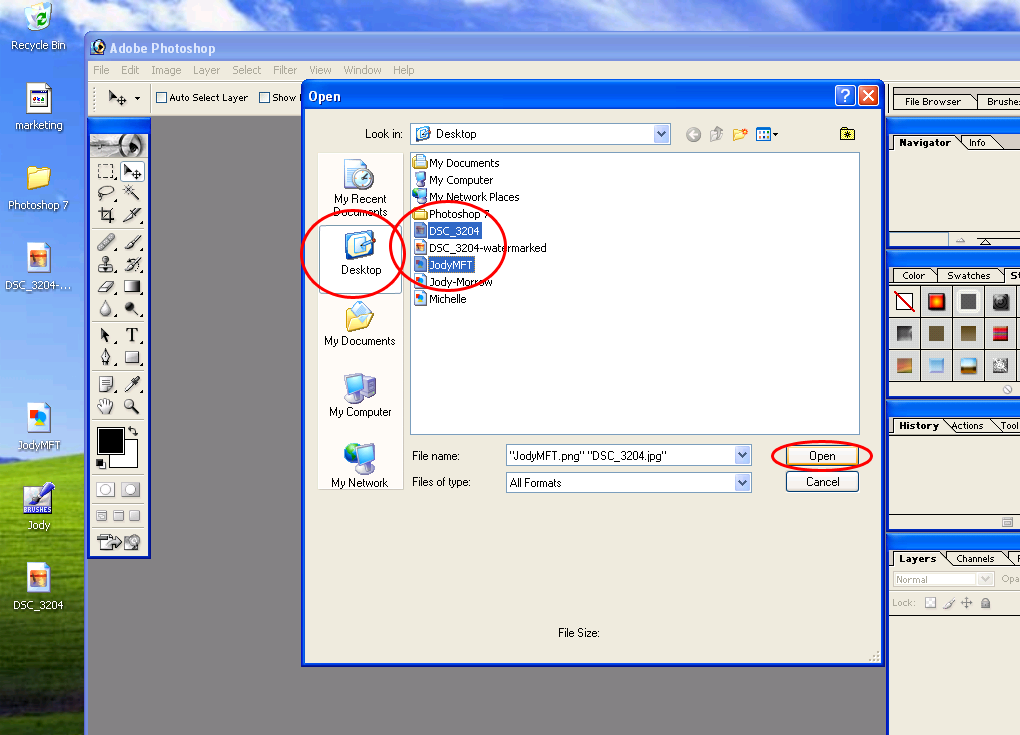
Click Desktop.
then click on both the photo and the watermark files. To select them both at the same time press and hold the Ctrl key on the keyboard wile clicking to select.
Click Open.
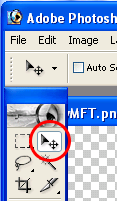
Now that the files are open make sure the Selection tool is selected.
The default location of the toolbar is the right. If it's not showing anywhere click on Window at the top of the program window and click on Tools.
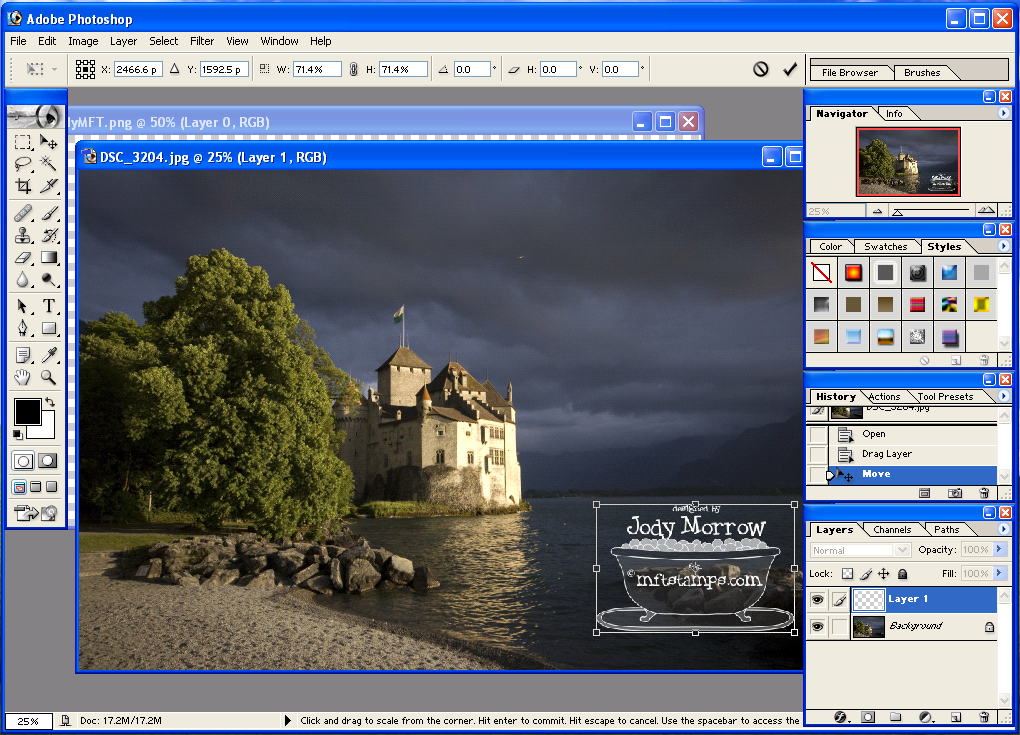
Now you will see both files open in Photoshop...simply drag the watermark from the watermark file onto the photo file:

The watermark will move a bit it's ok. Just keep dragging...to drag click on the watermark and keep mouse button pressed whiule moving the mouse. If you don't see both files as shown above click on Window>Documents>Tile.
The watermark is there. Just click on it and drag to position it.
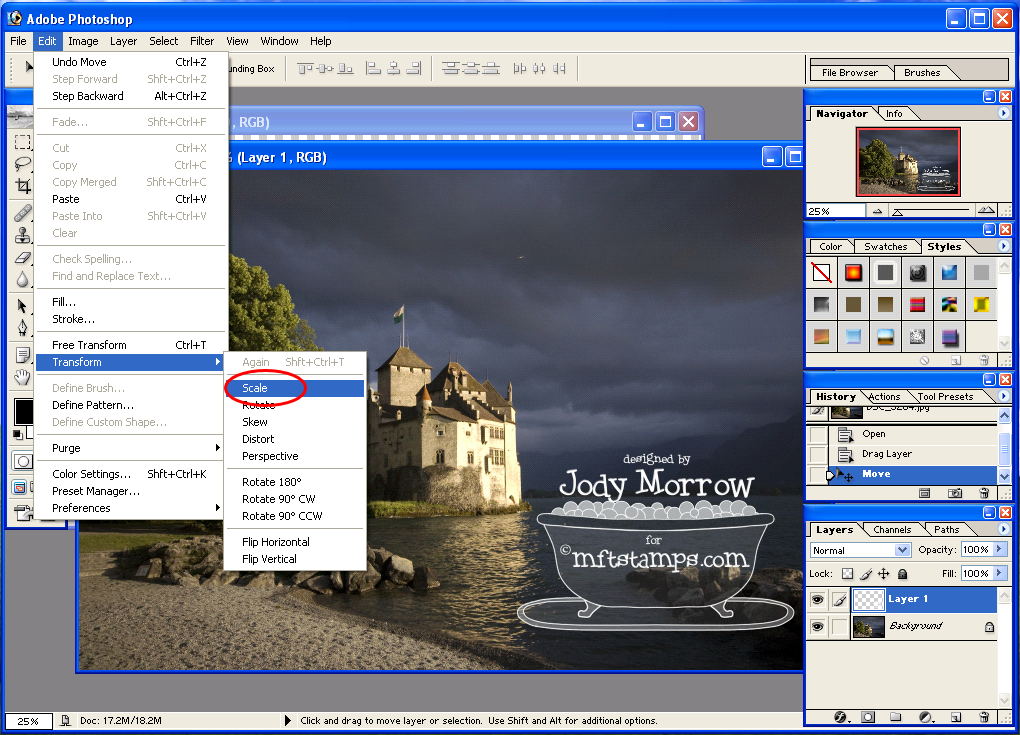
To resize click on Edit>Transform>Scale.
Press and hold the Shift key to constrain proportions while you drag the mouse to resize.

Hit enter on the keyboard when you have it the way you want it.
Now save your watermarked file. In order to keep your image in the original state as well you need to perform as Save As:
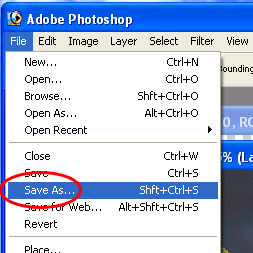
Give it a different name and save as jpeg:
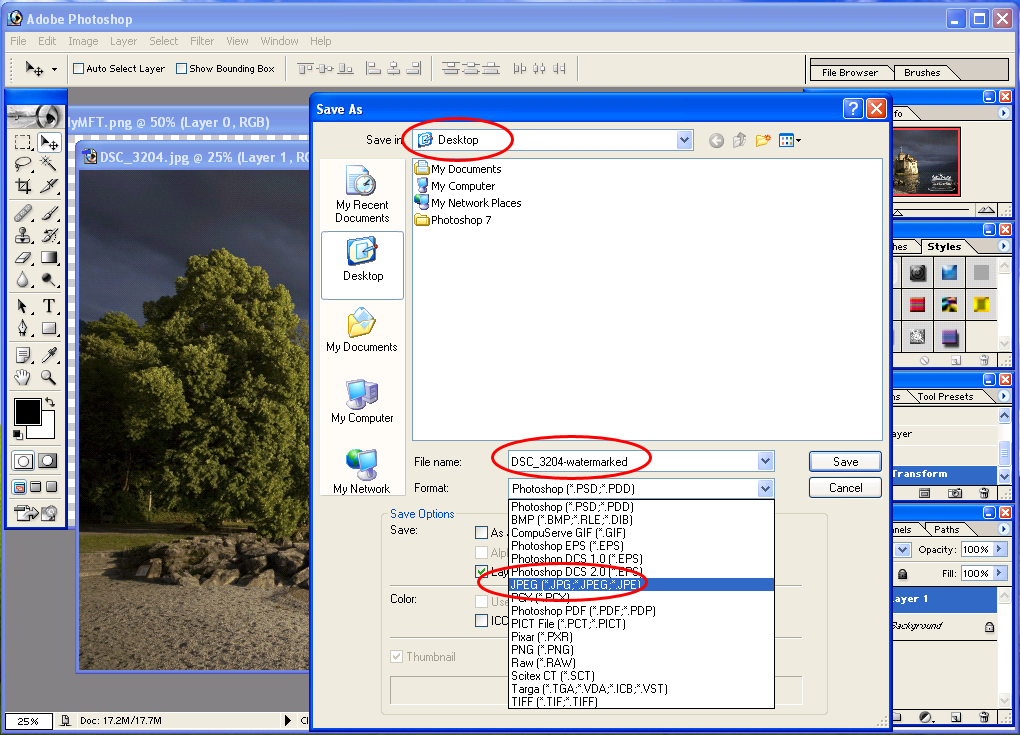
The default settings are fine, click OK.
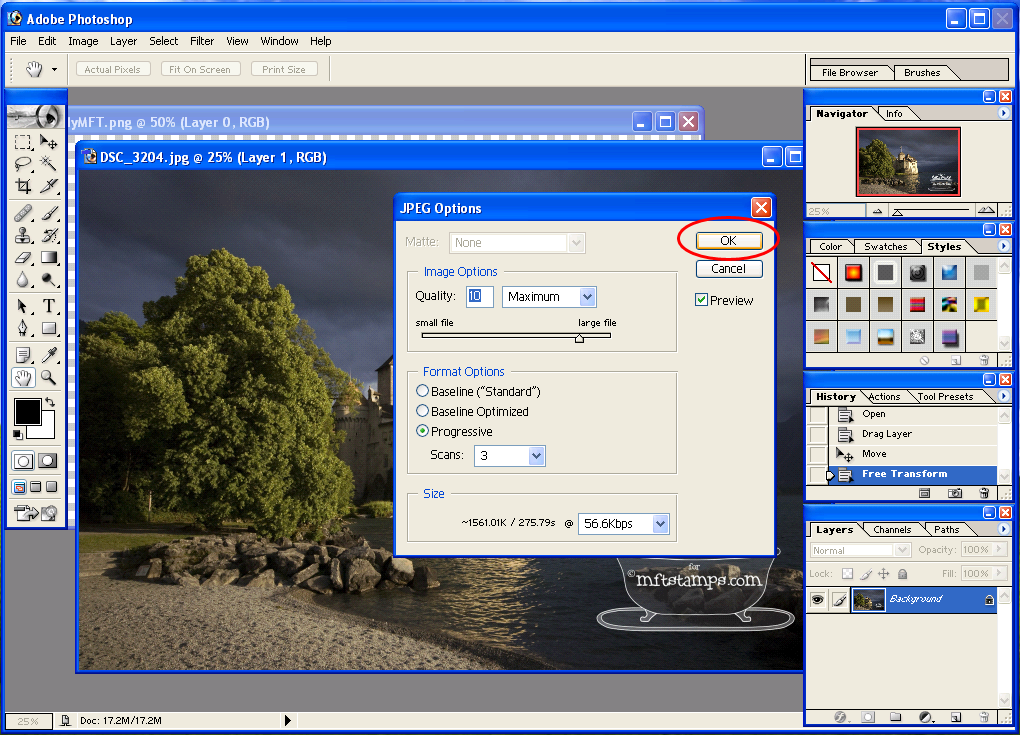
Here is the watermarked picture!

Let me know if my directions are unclear or if you need further help!


