**the code used here was taken from the Blogger Minima template, your code MAY vary...email me if you have a question**
So you found a cool template for Blogger or you just want to change to an existing Blogger template. Have switched templates before and lost your widgets? How would you like to install a template or two WITHOUT LOSING YOUR WIDGETS (or gadgets as they are now called)???? OK...I KNOW you do!!!!!!!!!! I've heard SO MANY people tell me about their horror stories so here's a short and sweet how to! Don't be a widget-less victim!!!!
First of all make sure you BACKUP your template!!!!! If you mess it up you can always upload...well you can't upload your widgets us you can get the rest back. To do this:
- Click on Customize from your blog.
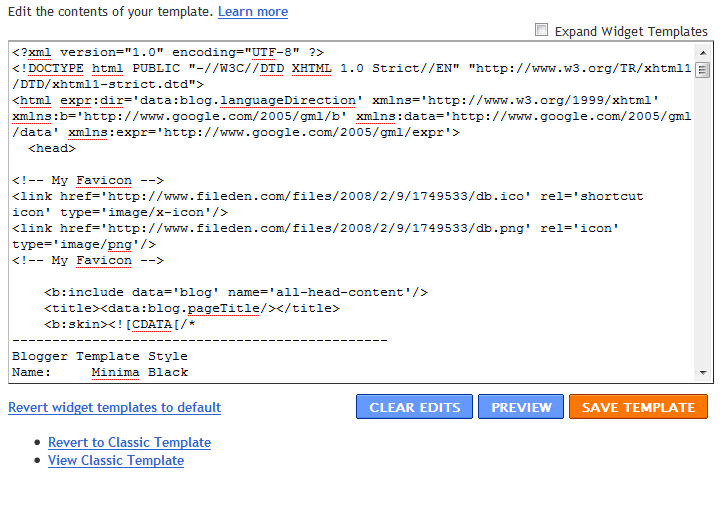
- Click Edit HTML
- Clock on Download Full Template.
- Choose the desired location and click save. The actual save process will vary depending on your operating system and web browser.
OK so now the "FUN" part! If you get the hang of this you can change your blog as often as you want!!!!
Since you are already in the Edit HTML area (because you should have backed-up) lets copy the widget code we will need to put into the new template.
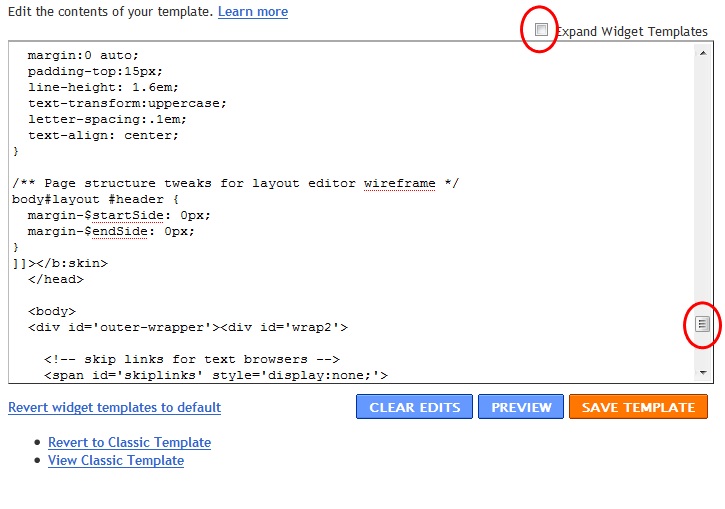
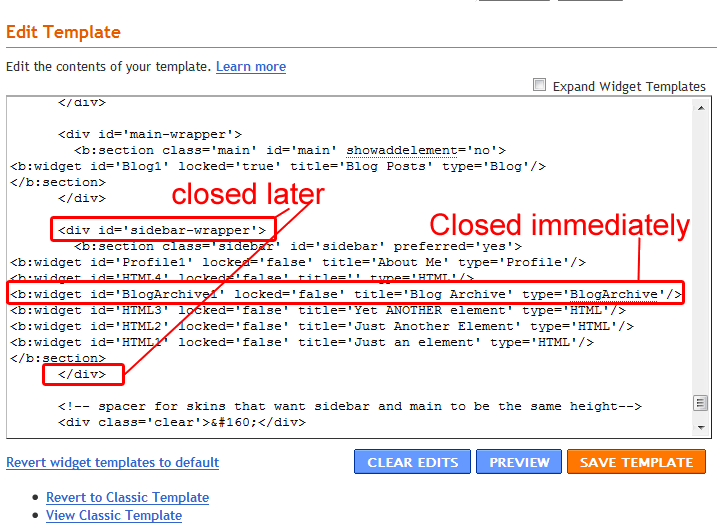
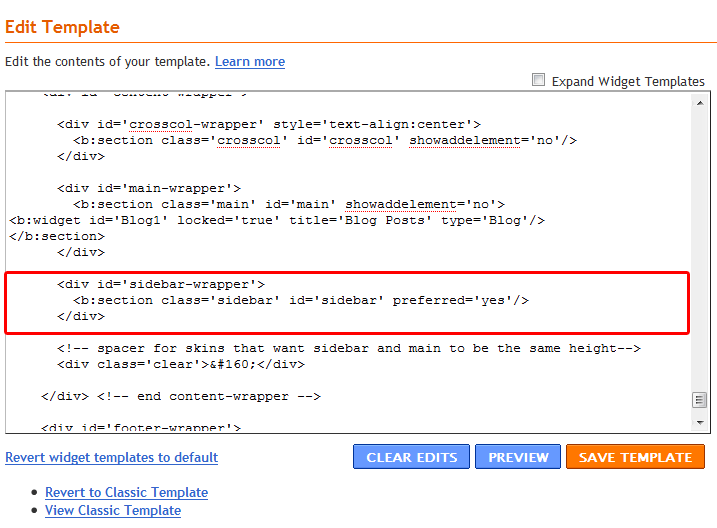
- You will need to scroll down in the Edit HTML scroll box to find to the widget code...here is a screen shot to help show you the code. Notice Expand Widget Template is not checked and I scrolled almost all the way down to find the code I needed.
I have selected the code I need. You're code will differ depending on how many widgets you have on your sidebars and the names and types of them. You want ALL the lines that resemble the ones I've selected.
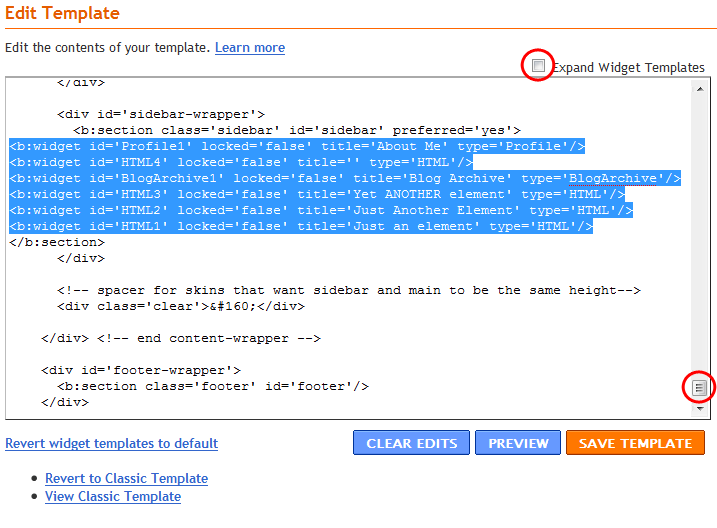
- To copy the code you first need to select it. Simply click the mouse at the END of the last line you need. While holding the mouse button drag the mouse to the front of the first line of code you need.
- Now right click your mouse on the selected code and click Copy.
Before we move on I suggest opening a new window so that you can leave your existing blog open. You will need it again soon.
The next step will be to create a new blog. I know your saying..."WHAT? But I don't need a NEW blog". Don't worry we are only using it for a while. Doing this will enable us to insert your widgets WITHOUT Expanding the Widget Template. Trust me, you want that!!!
I suggest opening a new window so that you can leave your existing blog open. You will need it again soon.
To create a new blog...(just in case someone helped you the first time):
- From your dashboard click on Create a Blog
- Choose a name
- Choose a template
- You're done!
To choose a Blogger template
- Click on Pick New Template
- Choose one and click Save
- Click on Edit HTML
- Next to "Upload a template from a file on your hard drive" click on Browse
- Choose your new template from your computer.
- Click on Upload
- Click on Save Template
- Delete any widgets you may have! To do this:
- Click on Layout
- Click Edit and then Remove on each widget.
- Click on Layout
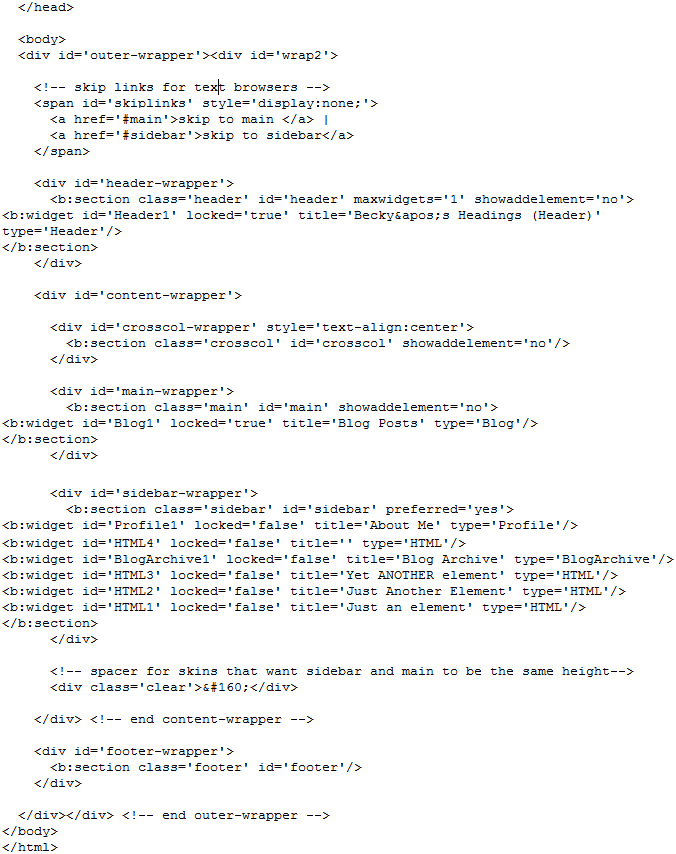
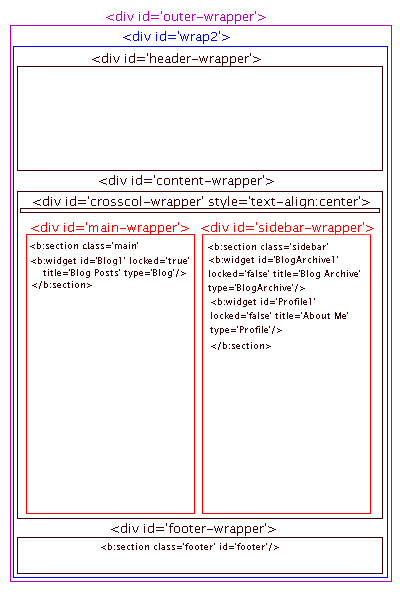
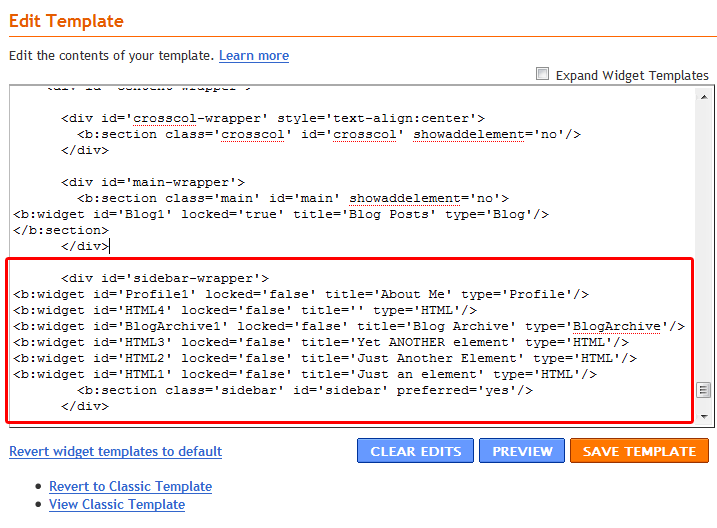
You need to paste the widget code between ...preferred=yes/> and the div under that line like this:
If you don't know how to paste here is how:
- First put your cursor right behind ...preferred=yes/>, to do this Click the mouse right behind it.
- Press the Enter key on the keyboard to drop down a line.
- Right click the mouse on your new line and click on Paste. If the code does not appear you lost it from the clipboard. Just go back to your current blog and copy the widget code again. Try pasting it now.
- Right click anywhere in the Edit HTML scroll box
- Click on Select All and then click Copy
- Right click anywhere in the Edit HTML scroll box and then click on Paste.
- Click on Preview. If you get any errors click on Cancel! If everything looks good close the preview and click on Save Template.
If you can't get it you can try the process again or try Method 2. You will be learning a little about Bloggers code! Or you can email me, I'll do it FOR YOU for a small fee.